How to use ‘Medstars Connect Doctor’ for Remote Consultations
Medstars Connect is a remote healthcare app that allows you to schedule appointments, receive payments and securely consult via video and live chat without revealing your personal contact details. Follow steps 1-8 of this guide to remotely connect with your patients using the ‘Medstars Connect Doctor’ app.
1) Download ‘Medstars Connect Doctor’
- Download ‘Medstars Connect Doctor’ to your smartphone by visiting the App Store or Google Play.
- You may see four apps listed (Medstars Connect Doctor, Medstars Connect Patient, Medstars NHS Clinician and Medstars NHS Patient).
- Health professionals should download ‘Medstars Connect Doctor’ and patients should download ‘Medstars Connect Patient’ for private healthcare appointments.
- Patients can either download the Patient app themselves, or you can invite them to do so later via your Doctor app.
You can also download the Doctor app for private healthcare via the buttons below:
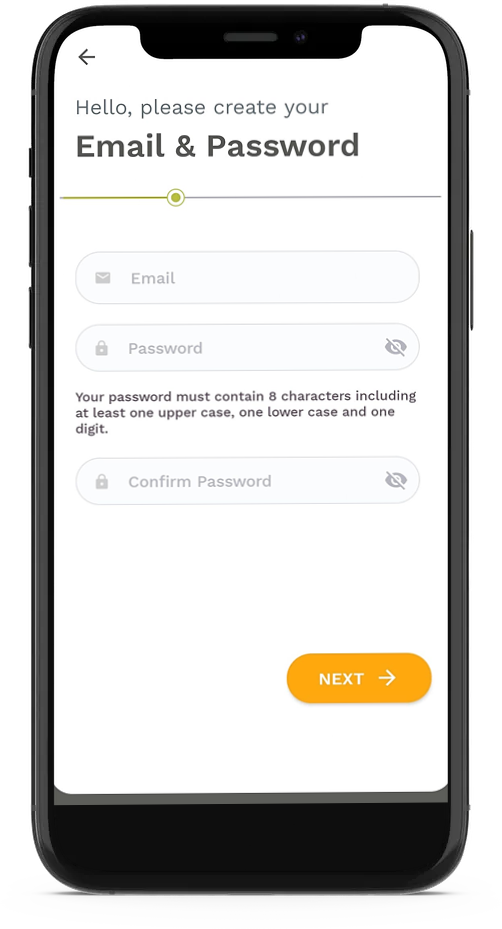
2) Create your ‘Medstars Connect Doctor’ account
Once downloaded, you’ll need to create your Medstars Connect Doctor account. This will only take a few minutes.
- Open your Doctor app and click the orange ‘REGISTER’ link.
- Provide your name, email address and mobile number.
- Add your statutory regulatory body, registration number and specialty.
- Then add your statutory regulatory body, registration number and specialty.
- Add your profile photo – we highly recommend you do this for security, and to help build confidence in patients unfamiliar with virtual consultations.
- Select your notification preferences and agree to our Ts&Cs. (You can modify these at any time.)
- Finally, verify your email address. This will be sent via email as a clickable link.
Once you’ve completed these short steps, you’re ready to go.
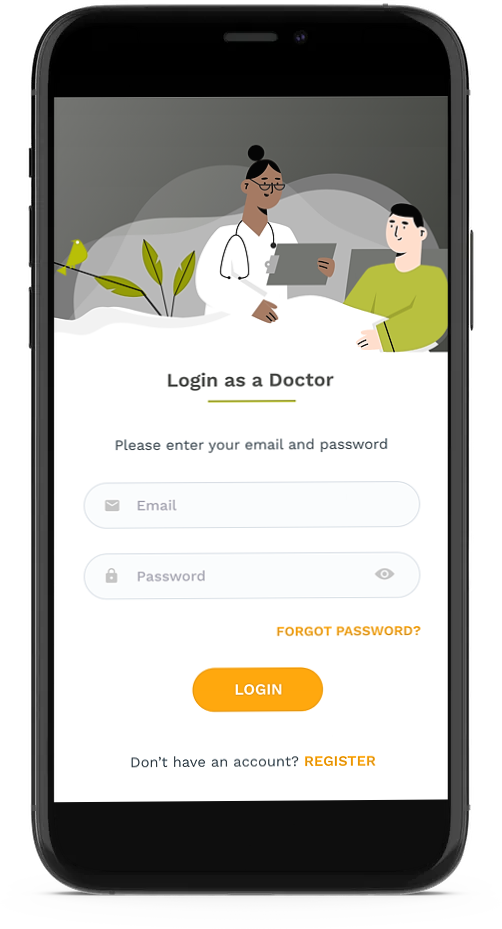
3) Log in to ‘Medstars Connect Doctor’
- Open your Doctor app and log in using the email and password you’ve just set up.
- Watch the quick introductory tour from the Welcome Wizard. You can skip this part but we wouldn’t recommend it! If you don’t have time the first time round, you can revisit it at any time.
4) Visit ‘My account’
Visit ‘My Account’ by clicking your profile picture at the top left-hand corner of your screen.
- Add your bank details securely via Stripe. (This is so you can receive patient fees via the app.) To do this, click ‘Bank Details’.
- Invite your secretary to join if you like. Click ‘My Secretaries’ and then click the orange ‘Invite Secretary’ link. Follow the in-app instructions from here. After you’ve sent the request, your secretary will receive an invitation via email. Once they’ve accepted, they’ll be asked to create an account to manage your appointments via the Desktop Portal. To learn more about the Desktop Portal, click here.
- Verify your mobile number by clicking ‘Edit Profile’, ‘Personal Details’ and then the orange ‘Verify’ link. (You need to verify your mobile number to receive SMS appointment reminders.)

5) Invite your patients to join Medstars Connect
There are two ways to invite your patients to join Medstars Connect. We recommend reading through both options because your method might vary depending on the scenario.
a) Invite your patient to join Medstars Connect without offering them an appointment. (This option is useful for when you or your secretary want to front-load as much of your admin as possible, but haven’t agreed an appointment date and time yet.)
- Log in to the Doctor app and select ‘Patient’ from the navigation bar at the bottom of your screen.
- Click the orange ‘Invite Patient’ button.
- Enter your patient’s mobile phone number and an accompanying note to let them know who you are.
- Your patient will then receive an invitation via SMS, where they can follow the link and download the Patient app. Once they’ve downloaded the Patient app and accepted your invitation to connect, their contact will move from ‘Pending Requests’ to ‘All Patients’ on your Doctor app.
- You can offer them an appointment at a later date by following the instructions for ‘Existing patients’ in the step below.

OR
b) Invite your patient to join Medstars Connect and send them an appointment request at the same time.
To do this, follow the instructions for ‘New patients’ in the step below.
6) Set up your video and live chat appointments
For existing patients
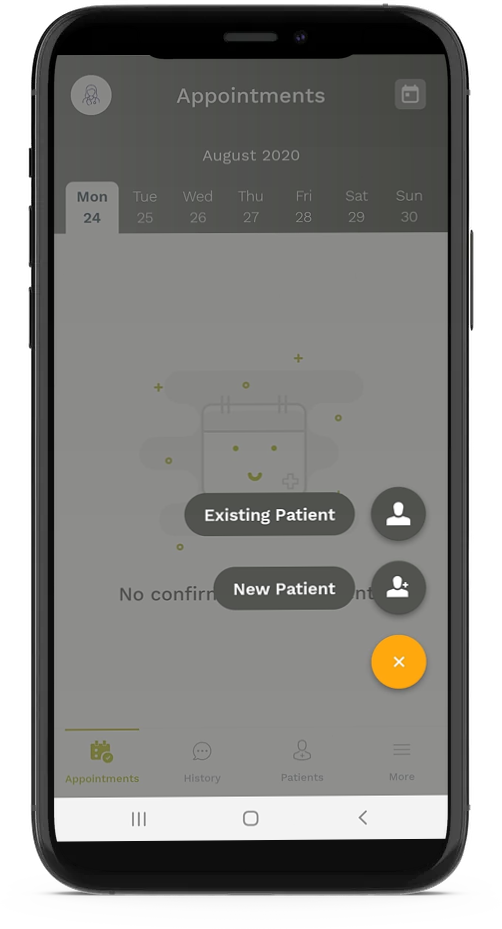
- Log in to the Doctor app and click the orange ‘+’ button on the ‘Appointments’ tab (this is your default page).
- Click the orange ‘+’ button and select ‘Existing Patient’ and then choose your patient from the list.
- Enter the date, time and duration of the appointment.
- Next, enter your patient’s mobile phone number.
- Then select the appointment type (video or live chat), and enter your appointment fee if applicable. If you don’t want to charge a fee, select ‘No online charges’.
- Finally, enter a quick note so your patients know who you are. Your patient will then receive an invitation to download the Patient app, as well as your appointment offer once they’ve logged in.
For new patients
- Log in to the Doctor app and click the orange ‘+’ button on the ‘Appointments’ tab (this is your default page).
- Click the orange ‘+’ button and select ‘New Patient’.
- Then work your way through the appointment set-up process as above./
- Enter the date, time and duration of the appointment.
- Next, enter your patient’s mobile phone number.
- Then select the appointment type (video or live chat), and enter your appointment fee if applicable. If you don’t want to charge a fee, select ‘No online charges’.
- Finally, enter a quick note so your patients know who you are. Your patient will receive an invitation to download the Patient app, as well as your appointment offer once they’ve logged in.
- and work your way through the appointment set-up process as above.
In either scenario, your patient will receive a notification to confirm their appointment and pay any fees due upfront. Once confirmed, it will appear in your appointments calendar. You can view your appointment calendar using your Doctor app or the Desktop Portal.
If you’ve followed the instructions in step 4 and added your bank details in advance, your fees will be transferred directly to you. You won’t be able to receive any patient fees without adding your bank details.
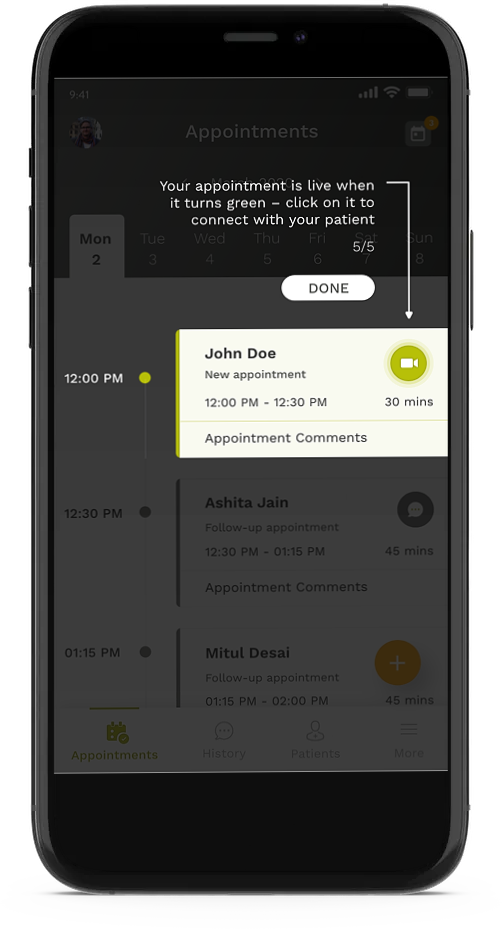
7) On the day of your remote appointment
The instructions below cover both video and live chat appointments.
- All appointments take place within the app.
- Both you and your patient need to open your respective apps to start the appointment.
- 10 minutes before the appointment time, the appointment will light up green to show that it is live. You can start the appointment by clicking it any time after this. Your patient’s appointment will also light up green. If they tap on it before you are ready, they will enter a virtual waiting room and you will be notified that they are there. If you are already waiting for them when they tap the green appointment, your appointment will start!
- During live chat appointments, both you and your patient can exchange files and photos.
8) After your remote appointment has ended
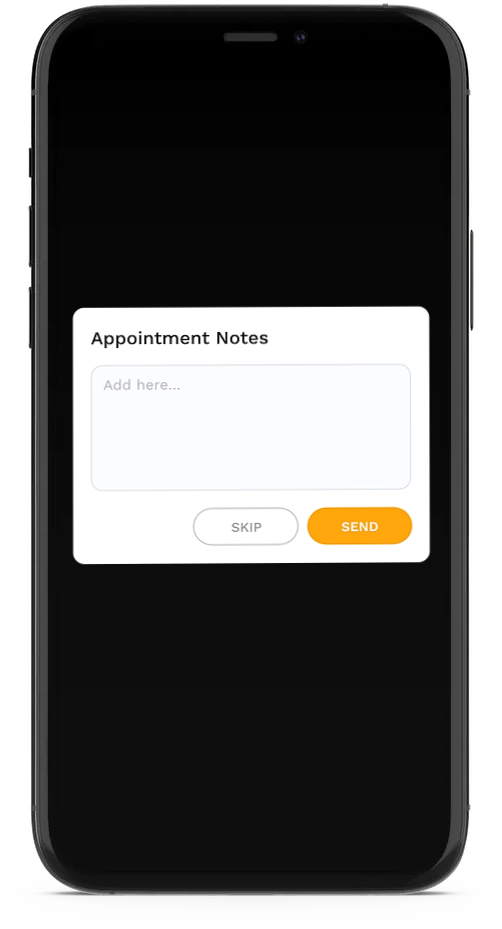
- Once your video call or live chat appointment has ended, you will be asked if you want to send a post-appointment note to your patient.
- This is a good opportunity to clarify medication or a treatment plan in writing, or arrange the next appointment.
- The appointment note will be attached to the completed appointment, which will have moved into both your and your patient’s ‘History’ tab at the bottom of your screen where past appointments are stored.
- If you or your patient want to send files, photographs or a message after the appointment, you can return to the completed appointment in the ‘History’ tab and send these at any time from here.
Click here for additional information about Medstars Connect, including our FAQs.
If you can’t find what you’re looking for, please email us at connect@medstars.co.uk